Generating SeqAn KNIME Nodes
- Learning Objective
- You will learn how to import applications written in SeqAn into the KNIME Eclipse plugin. After completing this tutorial, you will be able to use self-made applications in KNIME workflows.
- Difficulty
- Very basic
- Duration
- 1 h
- Prerequisites
- Eclipse KNIME SDK
- You can download it from the KNIME Download Site (at the end of the page). We will use Version 3.1.
- git
- For downloading the latest GenericKnimeNodes.
- Apache Ant
- The Generic KNIME Plugins project uses Apache Ant as the build system. On Linux and Mac, you should be able to install it through your package manager. For Windows, see the Apache Ant Downloads.
Important
The steps described here are necessary if you want to develop and test new SeqAn apps in KNIME. If you only want to use existing SeqAn apps in KNIME follow Creating Workflows with SeqAn Nodes in KNIME.
We will generate a simple SeqAn KNIME node from a SeqAn app that reads a fastq file from disk and just writes it back. We start by installing the necessary software. Afterwards, we explain which steps are required in order to prepare a SeqAn app to be used in KNIME, and finally, we show how to import the app into KNIME. The following section provides some more information on the plugin structure and where the necessary information is stored. Note that this tutorial is mainly written for MacOS and Linux users, but Windows users should also be able to follow through.
Preparation: Downloading GenericKnimeNodes
We will work in a new directory knime_node (we will assume that the directory is directly in your $HOME for the rest of the tutorial).
knime_node # git clone git://github.com/genericworkflownodes/GenericKnimeNodes.git
Preparation: Installing KNIME File Handling
We need to install support for file handling nodes in KNIME. In order to do that - Launch your Eclipse-KNIME-SDK
Tip
Launching Eclipse-KNIME-SDK
- If you are on a linux system you should browse to your knime_eclipse_3.1 installation double click on
eclipseexecutable.- If you are using MacOS X then you can launch the KNIME SDK 3.1 as you would launch any other application.
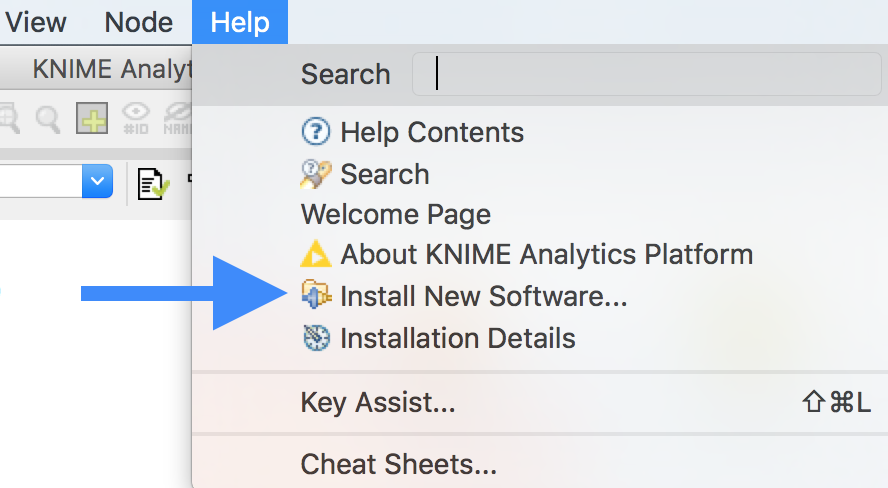
- Open the window for installing Eclipse plugins; in the program’s main menu:
Help > Install New Software....
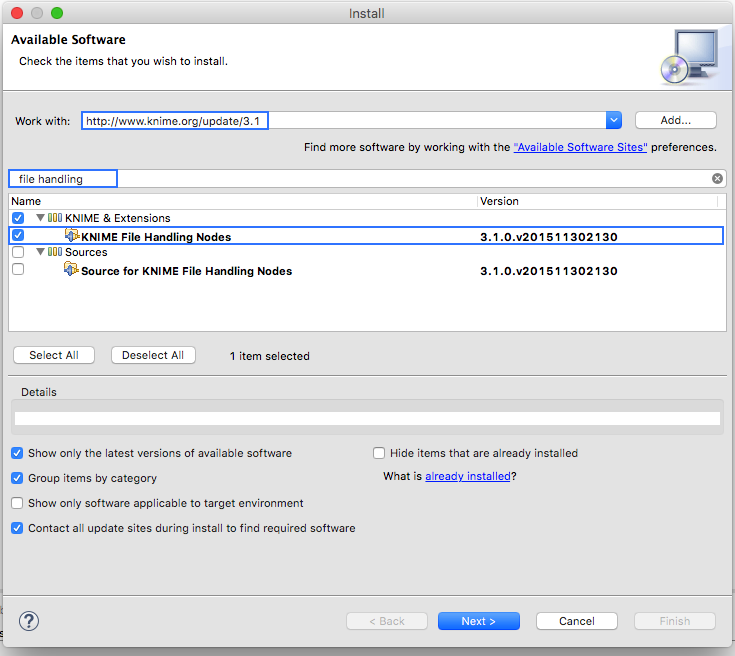
- On the install window enter
http://www.knime.org/update/3.1into theWork with:field, enterfileinto the search box, and finally selectKNIME File Handling Nodesin the list. - Then, click
Nextand follow through with the installation of the plugin. When done, Eclipse must be restarted.; in the program’s main menu:Help > Install New Software....
Generating KNIME Nodes for SeqAn Apps
You can generate a workflow plugin directory for the SeqAn apps using the prepare_workflow_plugin target.
In order for your application to turn into a KNIME node, you have to add the line:
set (SEQAN_CTD_EXECUTABLES ${SEQAN_CTD_EXECUTABLES} <my_app> CACHE INTERNAL "")
to the end of the CMakeList.txt file of your application.
The following example will demonstrate the creation of a SeqAn app and its registration as a KNIME node.
~ # git clone http://github.com/seqan/seqan seqan-src
~ # cd seqan-src
~ # ./util/bin/skel.py app knime_node .
Now open the file seqan-src/apps/knime_node/knime_node.cpp and replace its content with the one found in seqan-src/demos/knime_node.cpp. The code implements the reading of a read file and its storage somewhere on the disk.
In order to register the app knime_node, you simply add the line
set (SEQAN_CTD_EXECUTABLES ${SEQAN_CTD_EXECUTABLES} knime_node CACHE INTERNAL "")
to seqan-trunk/apps/knime_node/CMakeList.txt.
Then, you can generate the Knime Nodes/Eclipse plugin.
First, change to the directory GenericKnimeNodes that we cloned using git earlier.
We then execute ant and pass the variables knime.sdk with the path to the KNIME SDK that you downloaded earlier and plugin.dir with the path of our plugin directory.
~ # mkdir -p seqan-build/release
~ # seqan-build/release
~ # cd seqan-build/release
release # cmake ../../seqan-src
release # make prepare_workflow_plugin
release # cd ~/knime_node/GenericKnimeNodes
GenericKnimeNodes # ant -Dknime.sdk=${HOME}/eclipse_knime_2.8.0 \
                      -Dplugin.dir=${HOME}/seqan-build/release/workflow_plugin_dir
The generated files are within the generated_plugin directory of the directory GenericKnimeNodes.
If you ran into problems, you may copy the file knime_node_app.zip, which contains the knime_node app and the adjusted CMakeList.txt file.
Unpack this file in the apps directory.
You still have to call ant though.
Importing the Generated Projects into Eclipse
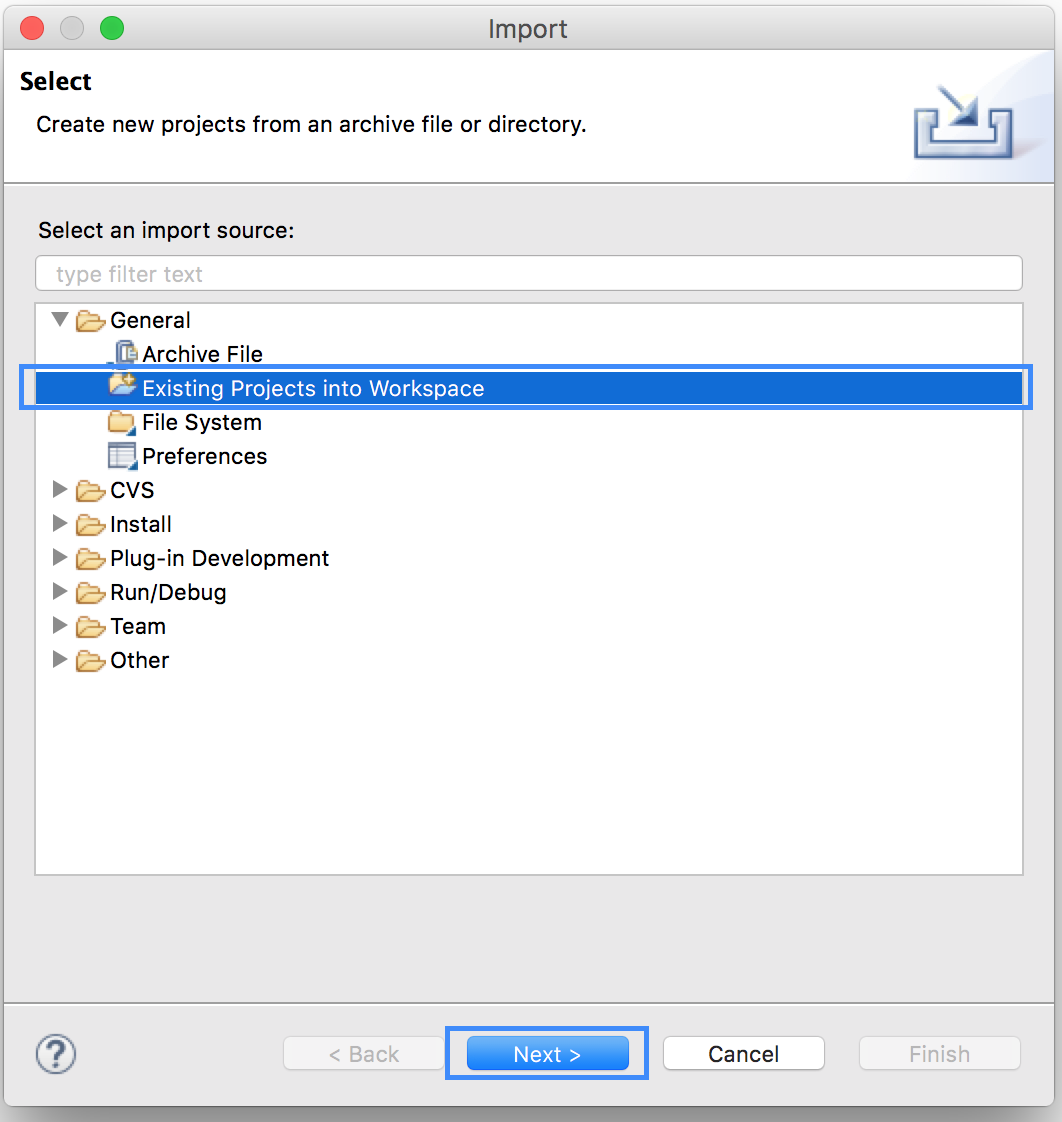
In the main menu, go to File > Import....
In the Import window, select General > Existing Project Into Workspace.
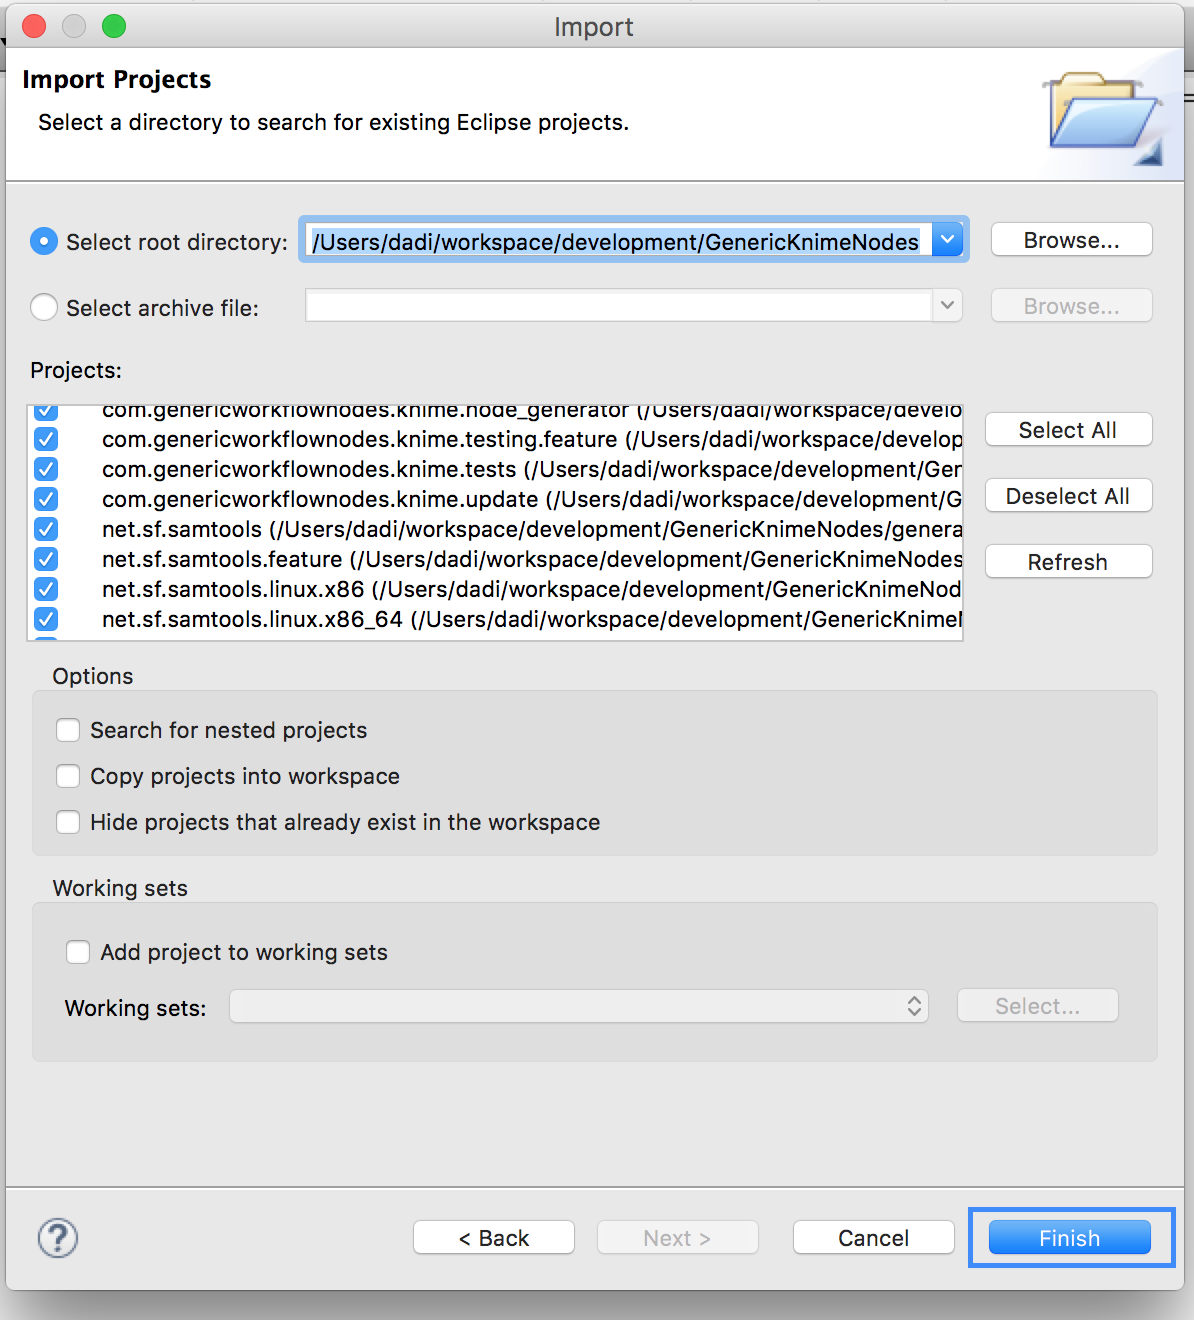
In the next dialog, click Browse... next to Select root directory.
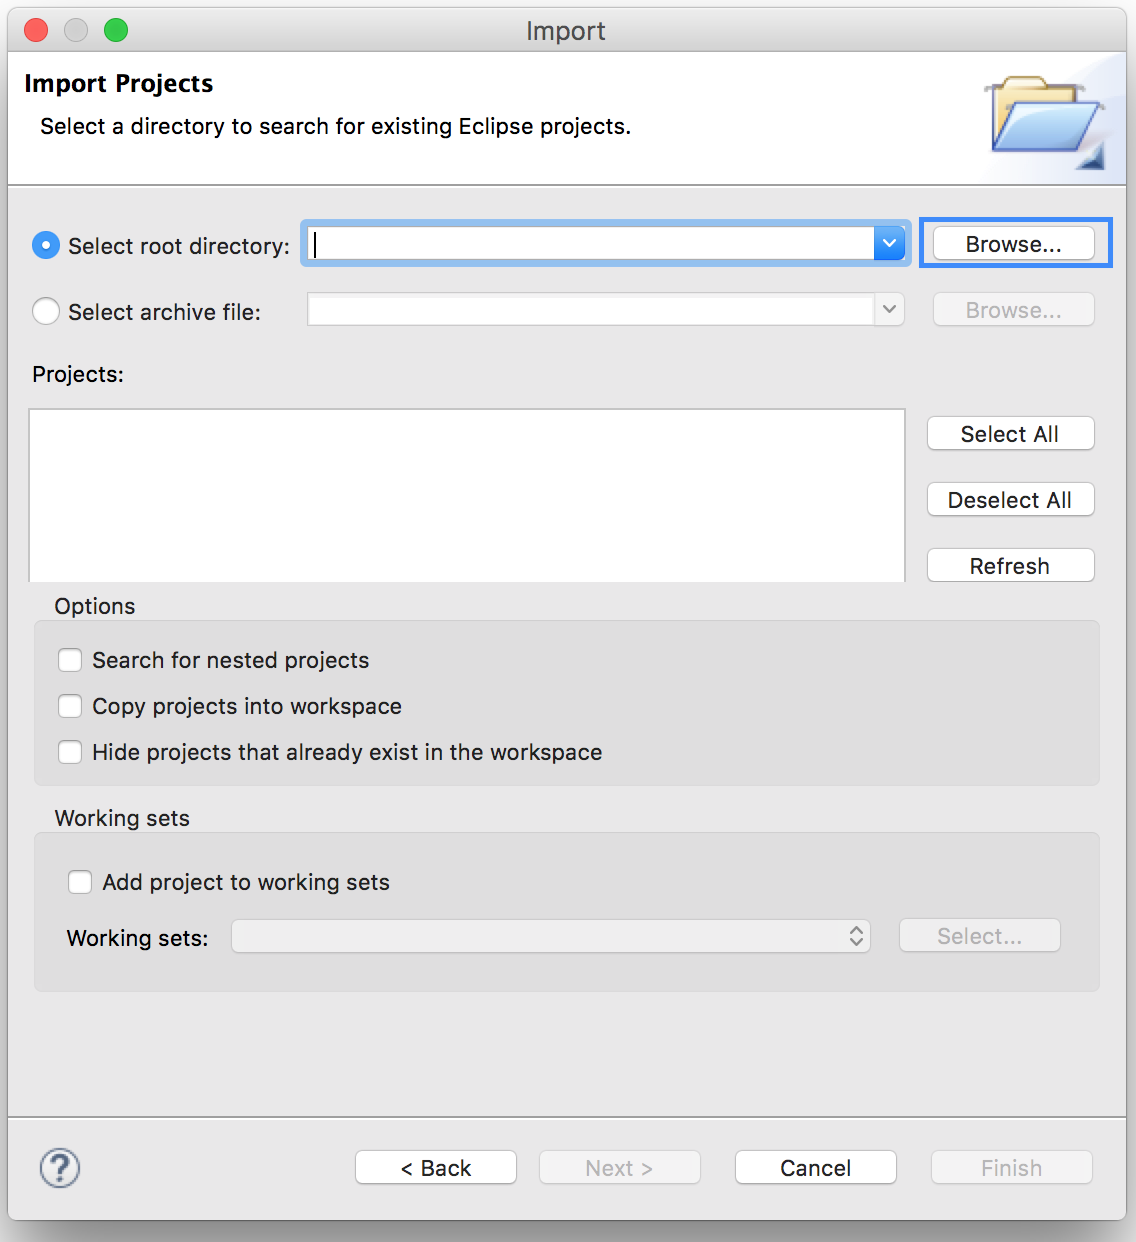
Then, select the directory of your “GenericWorkflowNodes” checkout. The final dialog should then look as follows.
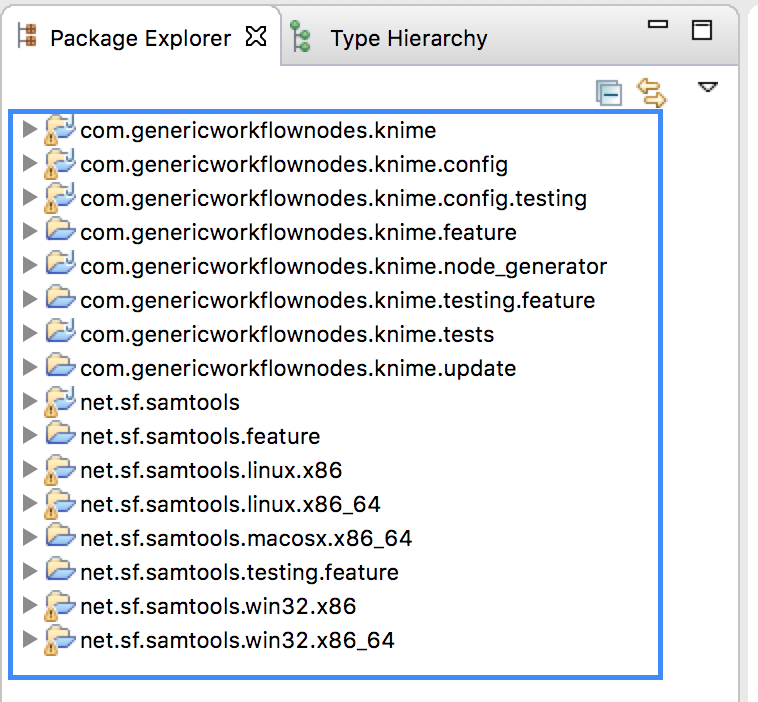
Clicking finish will import (1) the GKN classes themselves and (2) your generated plugin’s classes.
Now, the packages of the GKN classes and your plugin show up in the left Package Explorer pane of Eclipse.
Tip
Synchronizing ant build result with Eclipse.
Since the code generation happens outside of Eclipse, there are often problems caused by Eclipse not recognizing updates in generated ‘’.java’’ files.
After each call to ant, you should clean all built files in all projects by selecting the menu entries Project > Clean..., selecting Clean all projects, and then clicking OK.
Then, select all projects in the Package Explorer, right-click and select Refresh.
Tip
You might get a warning with in one of the KNIME files. In order to remove it you need to download the KNIME’s test environment, but you can just ignore the error in our case.
Launching Eclipse with our Nodes
Finally, we have to launch KNIME with our plugin.
We have to create a run configuration for this.
Select Run > Run Configurations....
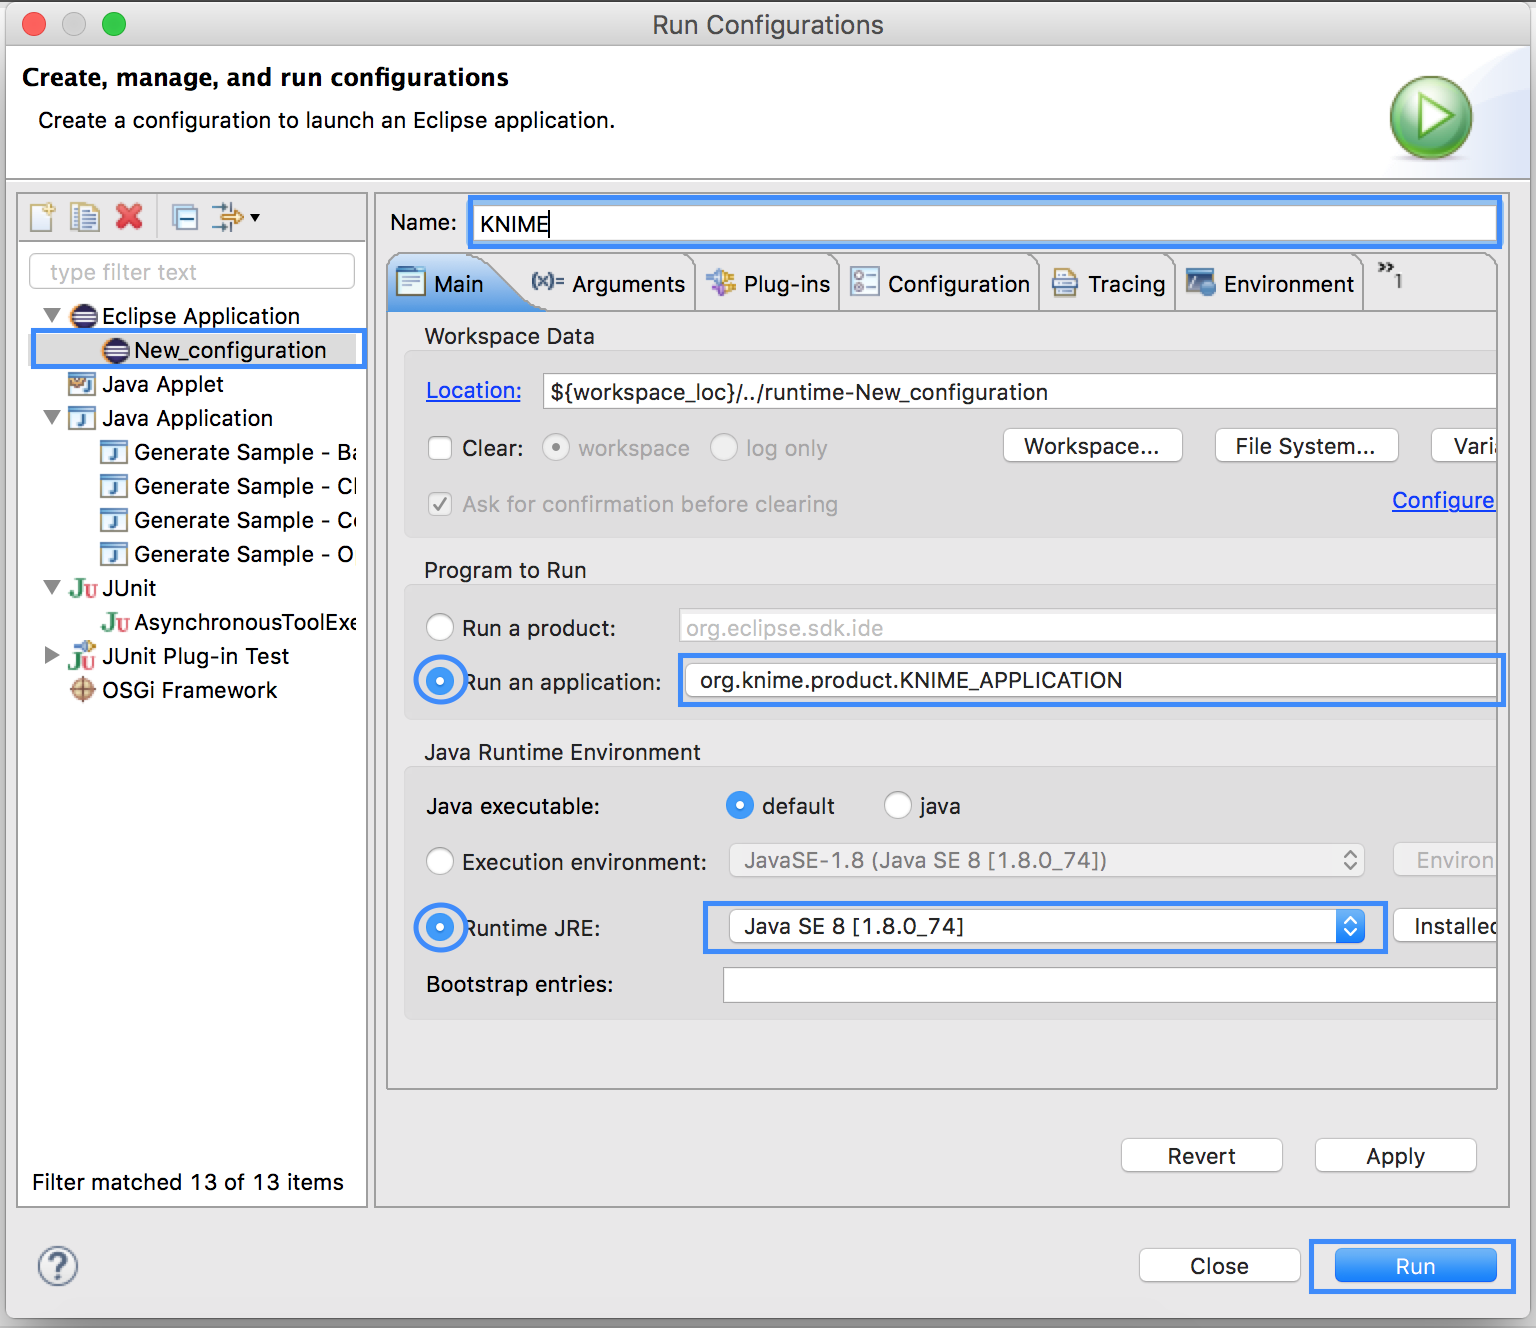
In the Run Configurations window, select Eclipse Application on the left, then click the small New launch configuration icon on the top left (both marked in the following screenshot).
Now, set the Name field to “KNIME”, select Run an application and select org.knime.product.KNIME_APPLICATION in the drop down menu.
Finally, click Run.
Your tool will show up in the tool selector in Community Nodes.
Important
Sometimes KNIME complains about the Java version you are using. In that case, you can use Java 1.6. as shown in Choosing The JRE Version.
Important
If you are running a MacOS you might need to add -Xms40m -Xmx512M -XX:MaxPermSize=256m -Xdock:icon=../Resources/Eclipse.icns -XstartOnFirstThread -Dorg.eclipse.swt.internal.carbon.smallFonts -server to the VM argument box of your Run Configuration.
You should now be able to use the created node in a KNIME workflow.
If you would like to learn more about the structure of the plugin and where the crucial information is stored you can read the Overview section of the tutorial Generating KNIME Nodes.